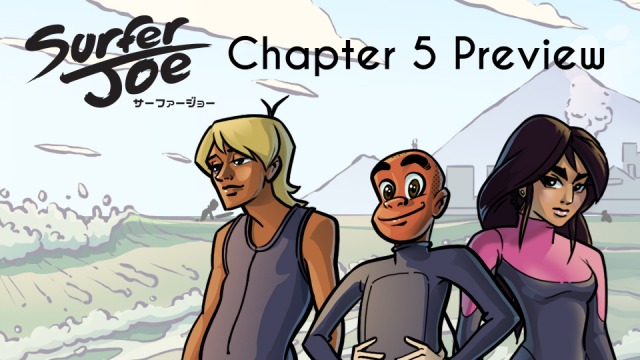
A Chapter 5 Sneak Peek, with updated character designs and preview pages
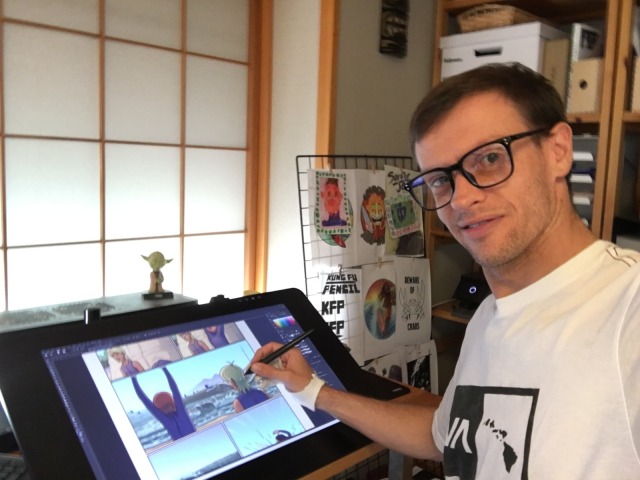
An inside look at how Surfer Joe is made!
With the Chapter 5 release just around the corner, now is a good time to share my writing and drawing process. With the events of Chapter 4 unfolding, I realized that making comics is a lot harder than I imagined. I needed to take a step back, rest, and start planning ahead for the story to come. A part of this process is the standardize the character designs and environments moving forward, so the artwork can be more consistent. I’ve put together this preview for your eyes to feast, so keep reading!
There will be some variance in the art style moving forward. I want to create a greater distinction between art that happens in flashbacks, flash-forwards, memories and dream sequences compared to the story in the present. These time jumps will give me an opportunity to play with style, while still having a standardized look to come back to. The goal is to draw the pages better and faster, without losing the spontaneous feel of the early chapters.
So how is a chapter of Surfer Joe put together?
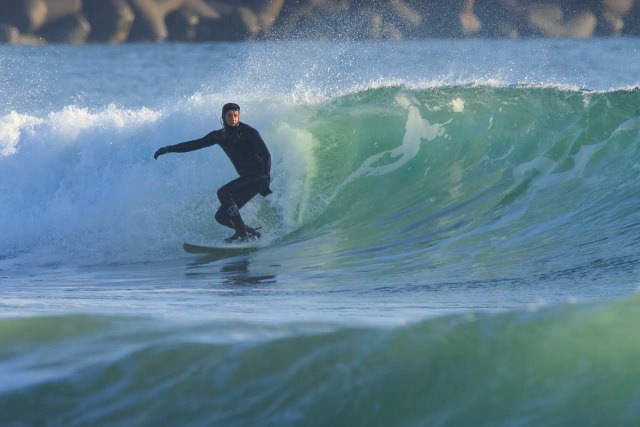
Step 1: Surf… er, research.
As the story is about a beginner learning how to surf, I try to get into the water a couple of times a week. I spend time reading about how to surf as well as watching instructional videos on Youtube. I take what I learn and apply it in the water. Then I take notes and see how I can incorporate it into Joe’s story. I also ask the surfers around me about their experiences. This is a constant process of learning.
Step 2: Discovery
When I start planning the first question I ask is: “What do I want the characters to learn in this chapter?” This applies to Joe first and foremost, but I ask it of the other characters as well. Because each character has their own struggles and desires, the answer is often different for each of them.
The next questions are: “What do the characters want, and what do they struggle against to achieve it?”
These are followed by: “Do they win?” If the answer is ‘Yes’, then what is the next obstacle? And if the answer is ‘No’ then how has the goal changed?
Then I start writing. I write down anything that comes to mind, sometimes it’s some dialogue, sometimes it’s a sketch. It’s all in fragments, and I just have to take the ideas as they come and render them into focus. But the events are still very vague. When I create, it is more a process of discovery than invention, like the characters and story already exist somewhere and my job is to uncover it and put the pieces together. By extension these characters are not “mine” as they are their own people. I’m just the observer.
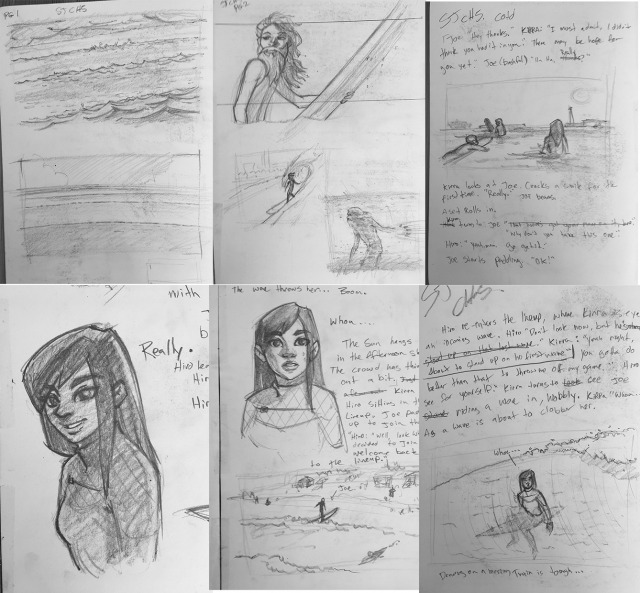
Step 3: Script and Layout
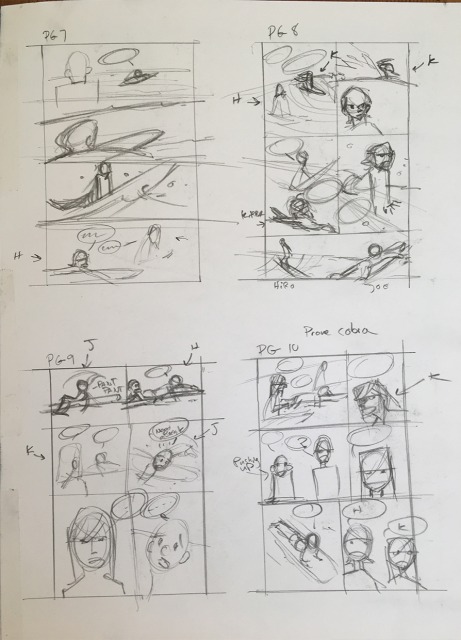
This is where it starts to come together, and we get a better picture of how the story will flow. I begin typing up the script, with dialogue and action that I like. This is also where I start drawing up the page layouts. I keep the drawings small and rough, called “thumbnails”.
This is the stage where we start to stitch the ideas from the discovery process together, and ideas that don’t fit are cut. The decision to cut something can be tough to make, even if it is obvious it doesn’t fit the story. The skill requires discipline.
With the script written and layout decided, it is time to hit the drawing table.
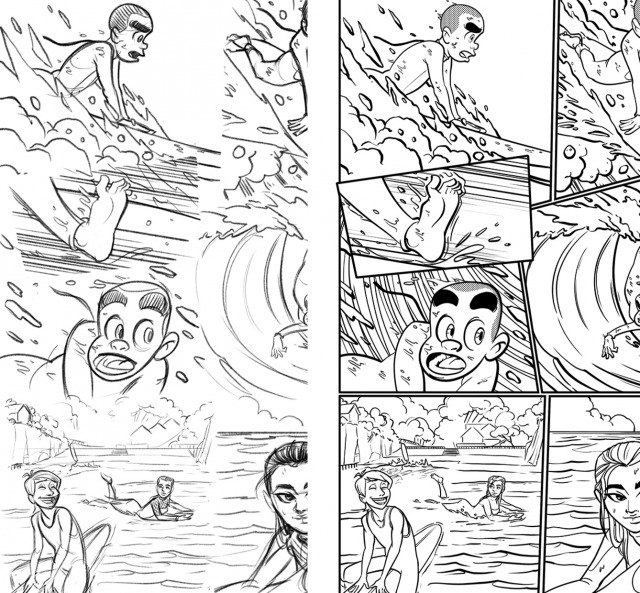
Step 4: Drafting
Once all the heavy planning is done, it’s time to have some fun! The goal of drafting is simple, make it look awesome. All the hard decisions are made and the focus shifts to executing the story. The writing part takes a lot of brainpower, and production is easy by comparison. Time to put on some music and draw!
The first step is to do the pencil drawings in medium detail. Once those are done, I go over the drawings again with a clean stroke and add the details.
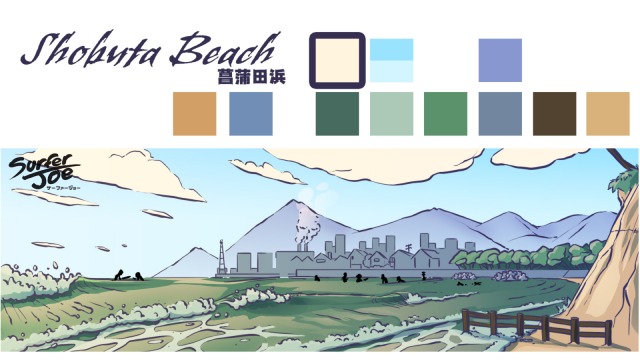
Step 5: The Magic of Colors
This is where it all comes together. Colors can do a lot for artwork. Good coloring can make mediocre drawings look amazing, and conversely bad coloring can make great drawings look lousy.
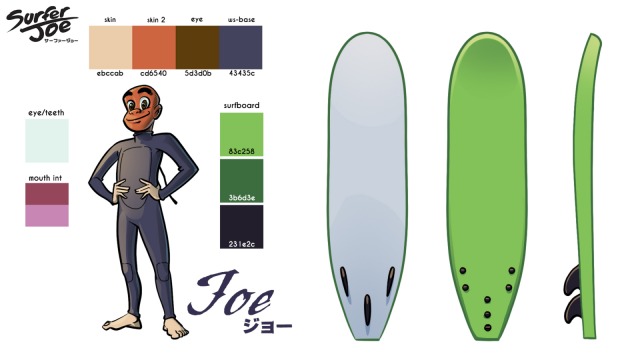
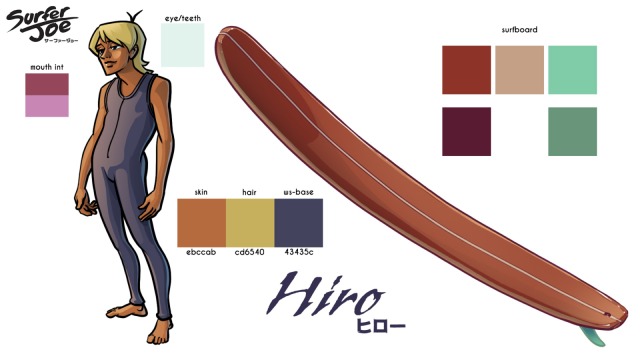
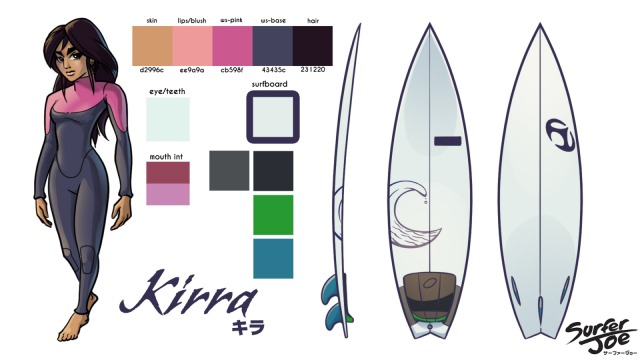
To make sure the colors are consistent, I make color guides for the characters and environments to follow. This changes the coloring process from a guessing game to paint by numbers. Now all it takes is to grind through it.
Thanks for reading this sneak preview! Click HERE to read the first few pages of Chapter 5! More coming soon…